How to Use a Tire Puncture Repair Kit: An Easy Guide
A small puncture can leave you stranded on the road, but a repair kit may get you to a tire shop.
A nail or screw in your tire can cause a slow air leak and leave you with a flat tire. If the puncture is small and located in the main tread area, a string-plug tire puncture repair kit may help you seal the hole temporarily.
You do not need advanced mechanical skills to use a basic tire puncture plug kit. However, you must know which punctures you can plug, how to insert the plug correctly, and when a punctured tire needs professional repair.
This guide explains all about using a tire puncture repair kit.
Note: A puncture repair kit with rubber string plugs and T-handles is only useful for tubeless car tires.
What Is a Tire Puncture Repair Kit?

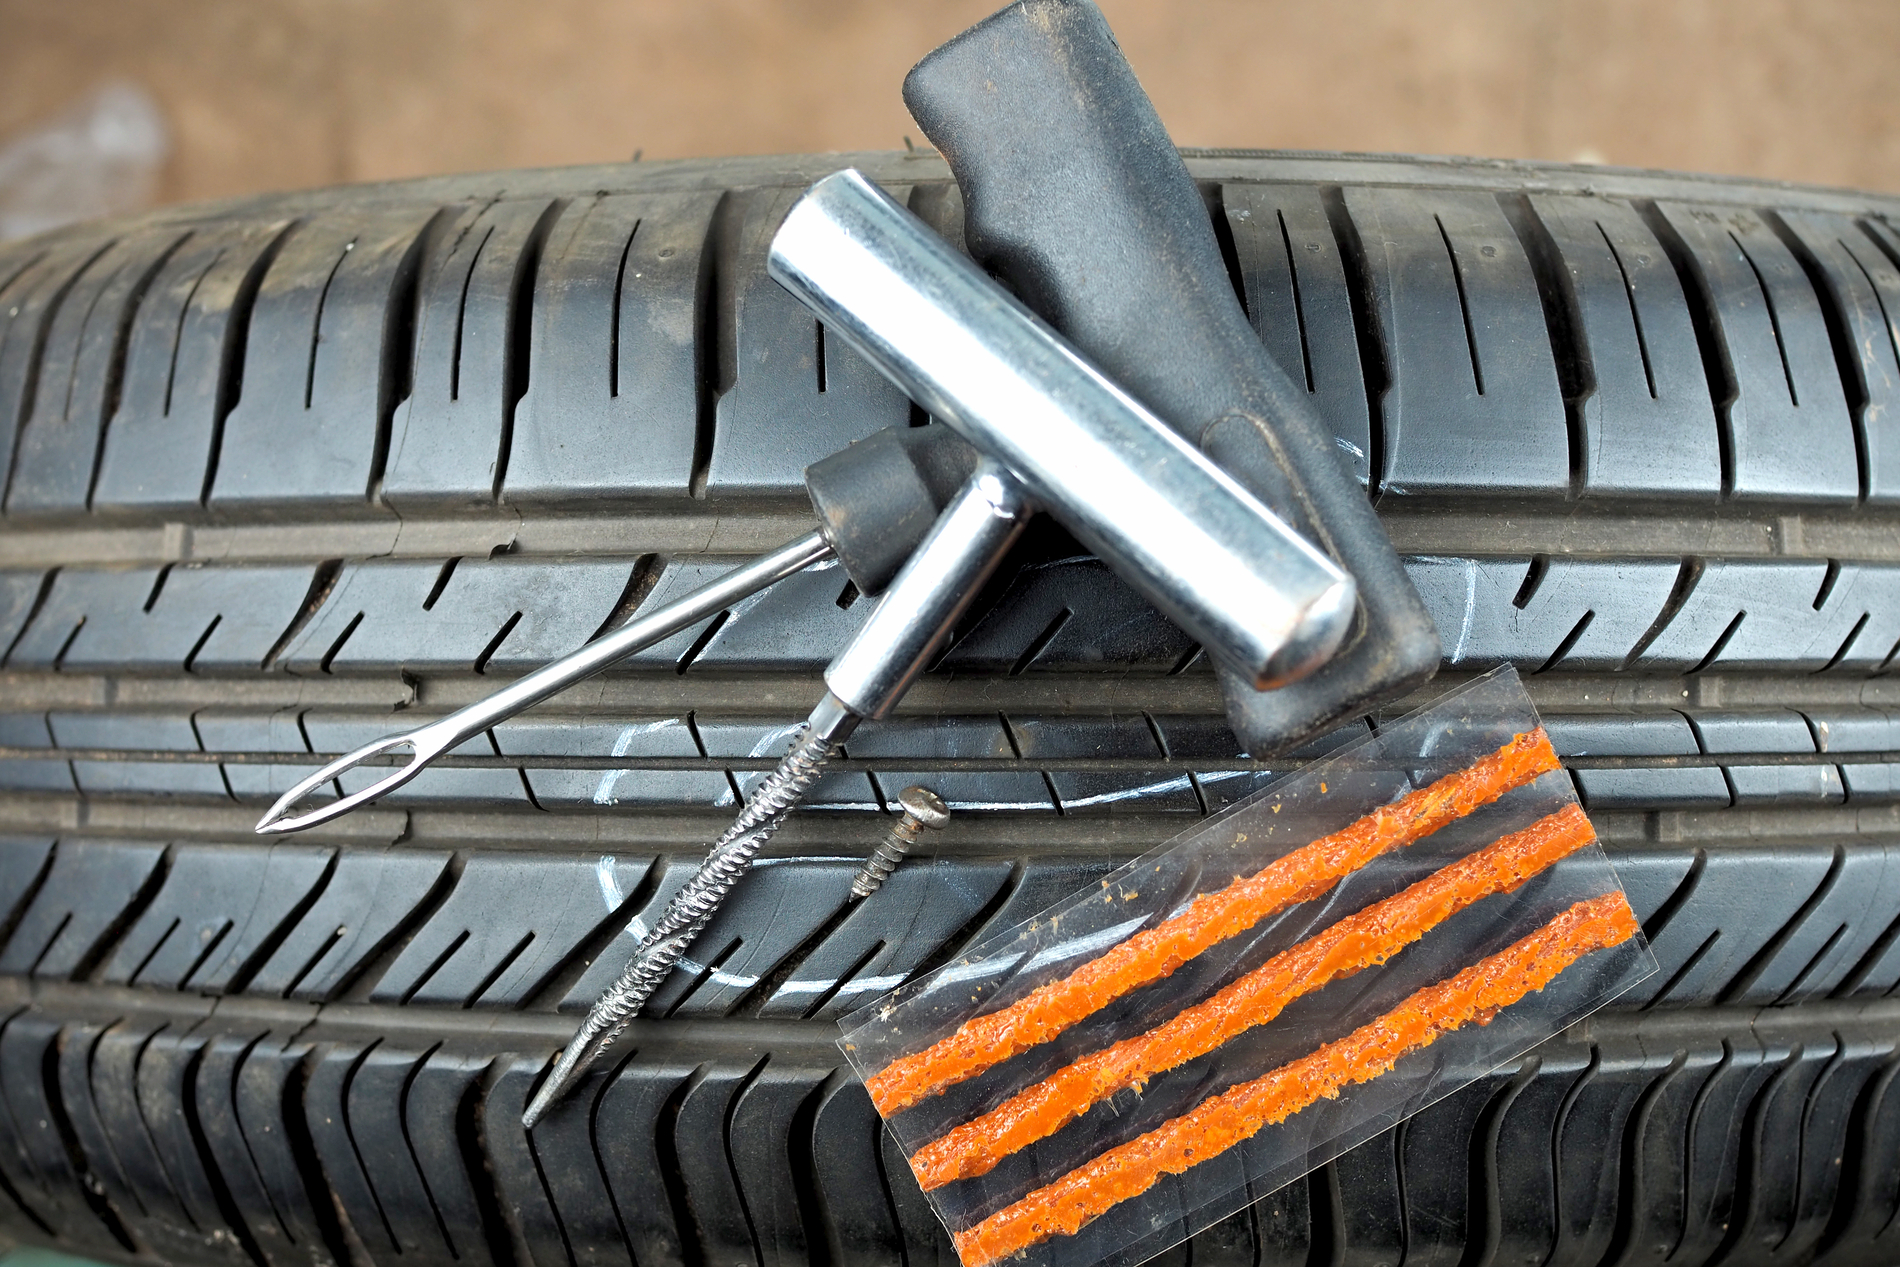
A tire puncture repair kit helps seal a small puncture in a tubeless tire without removing it from the wheel. Most basic kits include a T-shaped reamer tool, a T-shaped insertion tool, plug lubricant, and several sticky rubber or fiber strips. You use the reamer to clean and smooth the puncture hole, then push a sticky rubber string plug into that hole using the insertion tool.
Once inserted, the plug fills the puncture and prevents air from escaping.
A temporary tire puncture plug kit works well only if:
- The puncture is a clean, round hole, not a tear or gash.
- The hole is smaller than an inch.
- The puncture is in the flat surface that touches the road, not near the sidewall.
What You Need to Repair a Tire Puncture
Before starting, make sure you have the following items:
- Tire puncture repair kit
- Pliers to remove the nail or screw
- Portable air compressor or tire inflator
- Soapy water in a spray bottle
- Sharp scissors or a utility knife
- Protective gloves and safety glasses
How to Use a Tire Puncture Repair Kit, Step by Step
You generally do not need to jack up the vehicle or remove the wheel to plug a tire. If the puncture is hard to reach, roll the car forward or backward until the hole is in a workable position.
Before touching the tire, pull well off the road, turn on the hazard lights, put the vehicle in park with the parking brake applied, switch off the engine, and chock the wheels if you are not on flat, level ground.
Step 1: Find the Puncture

Look over the tire tread for anything sticking out, such as a nail, screw, or piece of glass. If you cannot spot it right away, listen for a hissing sound or spray the tire with soapy water and watch for bubbles forming at the leak.
You can also inflate the tire further to reveal a slow leak. Once you locate the puncture, mark the area with chalk or marker.
Check that the air is actually escaping from the tread, since you can’t repair a leaking valve or an air leak between the tire and wheel with a rubber plug.
Step 2: Remove the Object

Use pliers to grip the nail and pull it out of the tire along the angle it entered. If it’s a screw that is deeply embedded, you may need to turn it carefully while removing it. Check that no small fragments of the object remain inside the hole.
Do not remove the object until you have your repair kit ready. Removing it may cause the remaining air to leak more quickly.
Step 3: Ream the Hole

Take the T-shaped reamer tool from your kit and push it straight into the puncture, at the same angle as the object you removed. This takes a bit of effort, since you are working through the steel wires inside the tire.
Once it is through, push it in and out several times with a twisting motion. This step roughens the inside of the hole and shapes it evenly, which helps the rubber string plug grip and seal properly.
Step 4: Prepare the Rubber String Plug

Take a rubber plug strip from the kit and thread it through the eyelet of the insertion tool. Position the strip so that approximately equal lengths extend from both sides of the needle.
If your kit includes rubber cement, apply a coat to the plug strip now. This can help the rubber strip slide into the puncture more easily and adds extra sealing strength once it cures.
Step 5: Insert the Rubber String Plug
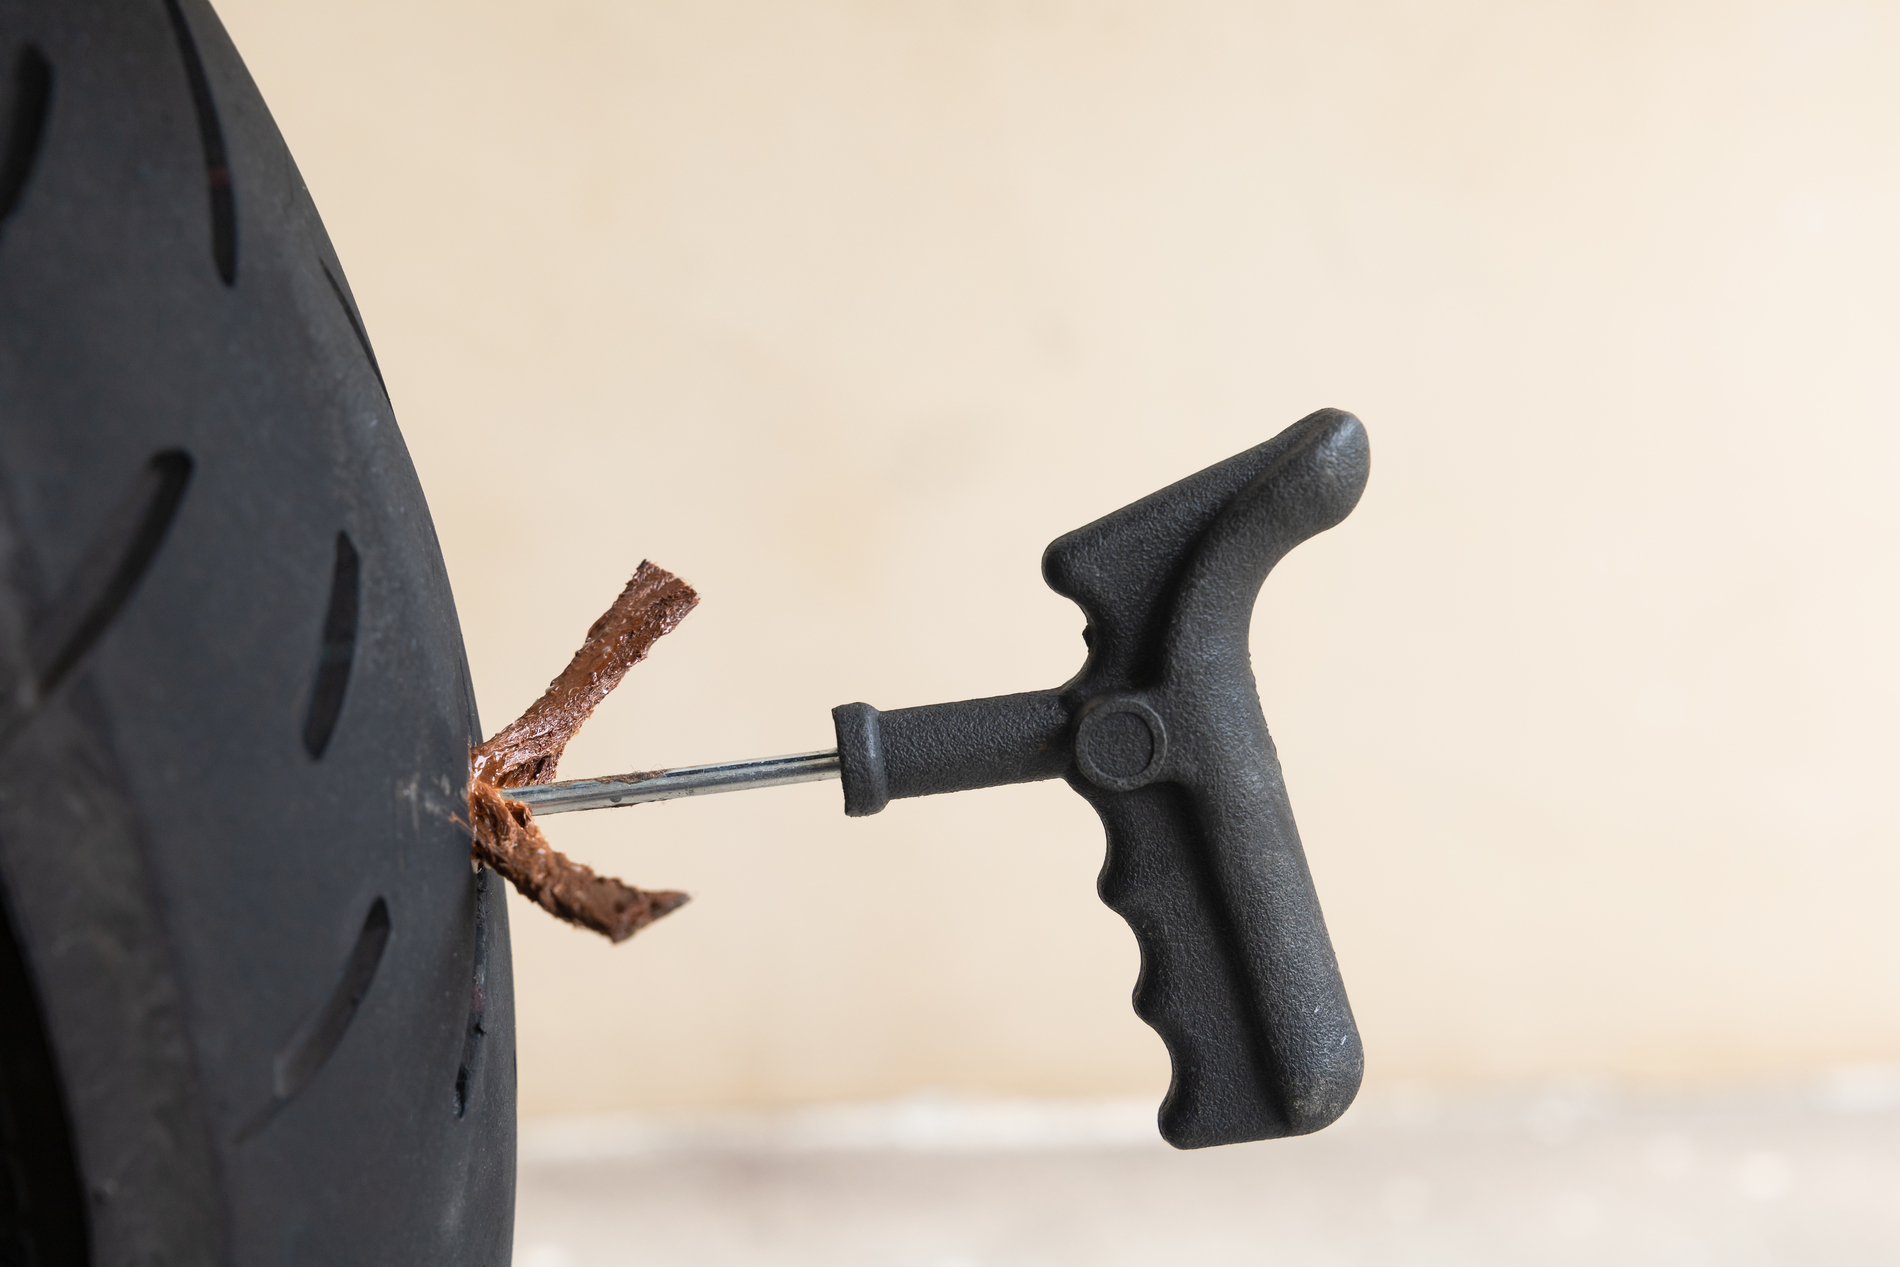
Push the loaded insertion tool straight into the hole, following the same angle you used for the reamer. Apply firm, steady pressure until most of the strip is inside the tire, leaving roughly half an inch to an inch still showing above the tread.
Do not push the entire rubber strip through the tire. The ends must remain outside so that the plug stays in place when you remove the tool.
Step 6: Remove the Insertion Tool

Once the rubber strip plug is properly positioned, pull the insertion tool straight out with a quick, controlled motion. Do not twist the tool while removing it.
The insertion tool should come out while the rubber plug remains inside the puncture. You should now see two short ends of the rubber strip protruding from the tire tread.
If the entire plug comes out with the tool, the puncture isn’t sealed. Don’t assume the repair is complete.
Step 7: Trim and Let It Set

If you used rubber cement, let it cure for five to ten minutes before moving on. Use sharp scissors or a utility knife to trim the exposed rubber ends.
A small amount left standing proud of the tread is fine and will wear down on its own. Be careful not to cut into the tire itself. The rubber strip should remain firmly seated in the puncture.
Step 8: Reinflate the Tire and Check

Fill the tire to the pressure listed on the sticker inside the driver’s door, not the maximum pressure printed on the tire’s sidewall. Spray the plug area with soapy water one more time to confirm no bubbles are forming. If the seal holds, you are ready to drive.
Final Thoughts
A tire puncture repair kit can help you handle a small puncture when professional assistance isn’t immediately available.
The process is simple: locate the puncture, remove the object, prepare the hole, insert the rubber plug, trim the excess material, inflate the tire, and check for leaks.
The most important part is knowing when not to use the kit. Never attempt to plug a damaged sidewall, a large puncture, or a tire that may have suffered structural damage.
Use a tire plug to deal with an emergency, then have the tire professionally inspected and repaired before returning to normal driving.