How to Replace Your Car’s Cabin Air Filter (Step-by-Step Guide)
One small filter decides how clean and refreshing the air inside your car really is.
Every time you turn on your car heater, air conditioner, or defroster, air passes through a filter before it reaches you. That filter is the cabin air filter, and most drivers don’t think about it until the vents start to smell musty or the airflow weakens.
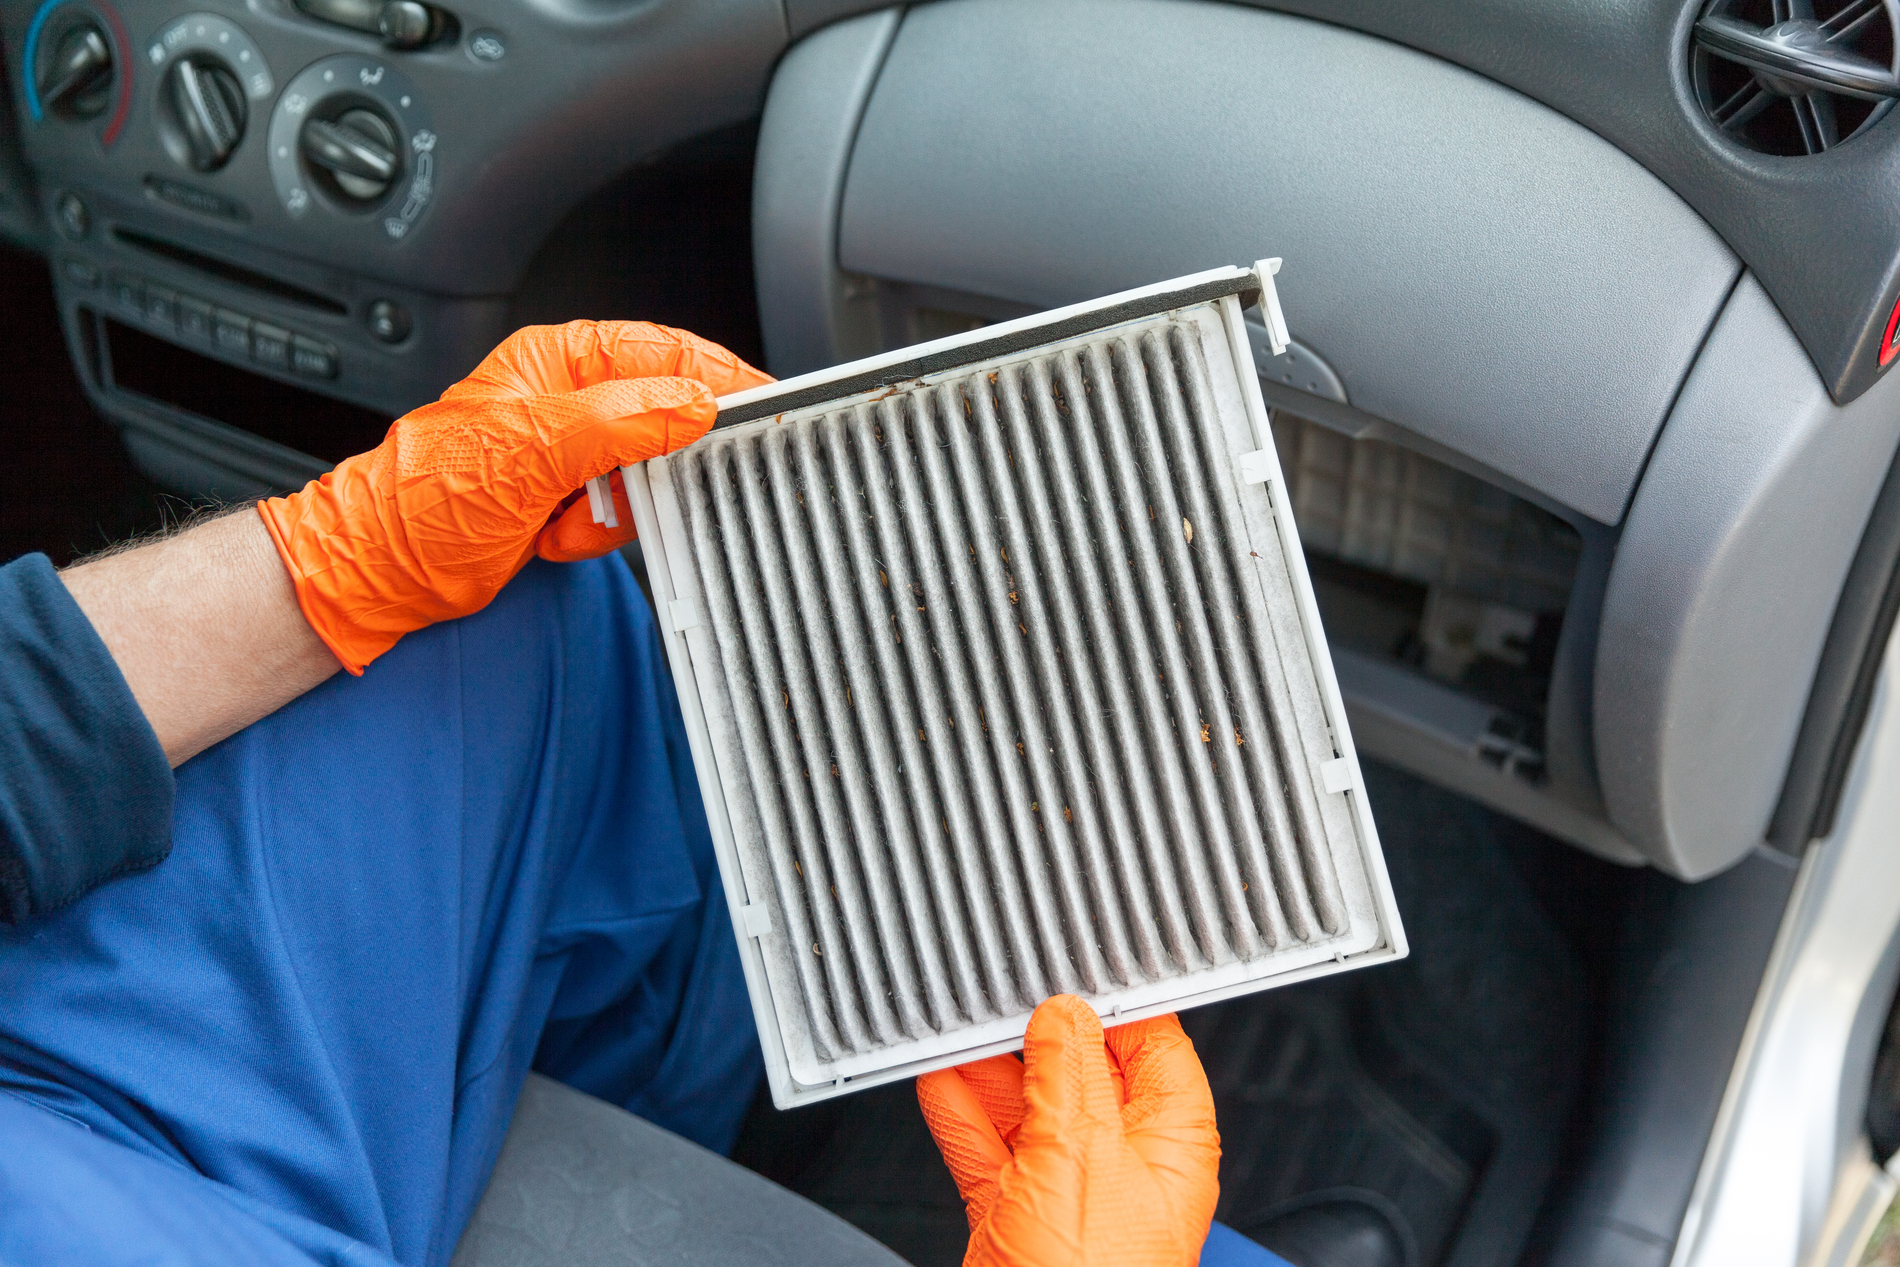
A cabin air filter traps dust, pollen, road grime, and other airborne particles. Many filters also use an activated carbon layer to reduce odors from exhaust and traffic. Over time, the filter fills up with everything it has trapped and gets clogged.
The good news is that replacing it is one of the simplest jobs you can do on your own car. This guide walks you through the entire cabin air filter replacement process and much more.
How Often to Replace the Cabin Air Filter?
There’s no single interval that applies to every car, because driving conditions vary widely. As a general guideline, most manufacturers recommend replacing the cabin air filter every 12,000 to 15,000 miles, or about once a year, whichever comes first.
If you regularly drive on dusty or unpaved roads, sit in heavy traffic, or live in an area with high pollen counts or wildfire smoke, consider replacing it more often. Or you may also watch for these symptoms:
- Weak airflow from the vents
- A musty or stale smell when the AC or heater is on
- More dust is settling on the dashboard or seats
- The defroster doesn’t work
Tools and Materials You’ll Need
Replacing the cabin air filter is one of the few car maintenance jobs that rarely requires special tools. Gather the following before you start:
- A replacement cabin air filter that matches your vehicle’s model year and make
- A flashlight, for a clear view inside the glove box or dash area
- A small screwdriver, in case your vehicle uses screws instead of clips
- Disposable gloves since old filters are often dusty
- A small vacuum or a damp cloth to clean out the filter housing
Where to Find the Cabin Air Filter in Your Car
Location varies by manufacturer, so this is the step where your owner’s manual can be especially helpful. That said, most vehicles place the filter in one of three general spots:
- Behind the glove box: This is the most common location on modern cars. The filter housing sits behind the glove compartment, and you need to open or remove the glove box to reach it.
- Under the hood, near the windshield: Some vehicles place the filter in a housing near the base of the windshield, called the cowl. You may need to remove a plastic cowl cover to access it.
- Behind a kick panel or lower dash trim: A smaller number of vehicles, including some luxury and European models, tuck the filter behind trim panels near the passenger footwell.
If you’re not sure which category your car falls into, a quick Google search typing your car’s exact year, make, and model, along with the words “cabin air filter location,” will usually give you the answer.
Step-by-Step: How to Replace the Cabin Air Filter
These steps cover the general process for most vehicles. Your car may have small differences in fasteners or panel design, so keep your owner’s manual nearby for reference.
Step 1: Park and prepare.
Park on a flat, level surface and turn off the engine.
Step 2: Locate the filter housing.
Using the guidance above and your owner’s manual, find where the filter sits.
Step 3: Gain access to the housing.
If the filter is behind the glove box, empty it first. Most glove boxes have a stopper or damper arm on one side that you can gently squeeze or unclip to let the box swing down further than normal or come out entirely. If the filter is under the hood or behind a trim panel, you may need to unscrew or unclip a cover instead.
Step 4: Remove the old filter.
Once you can see the filter housing cover, release the tabs or screws holding it in place and open it. Slide the old filter straight out. Before you discard it, note the direction of the airflow arrow printed on its frame. This tells you which way the new filter needs to face.
Step 5: Clean out the housing.
Use a small vacuum or a damp cloth to remove loose dust and debris from inside the empty housing.
Step 6: Install the new filter.
Check the new filter for its own airflow arrow, and match its orientation to the one you noted from the old filter. Slide it into the housing until it sits flat, with no gaps around the edges.
Step 7: Close everything back up.
Reinstall the housing cover and snap or screw it back into place. If you removed the glove box, reattach it the same way it came off, making sure any pins, screws, or damper arms are back in their original positions.
Step 8: Test the airflow.
Start the car and turn on the fan at a high setting. If air seems restricted or the fan sounds strained, double-check that the filter is seated correctly and the housing cover is fully closed.
Final Thoughts
Replacing your cabin air filter is one of the easiest ways to keep your car’s interior air clean and your HVAC system running efficiently. With the right filter in hand and a few minutes of your time, you can handle this job yourself and skip the labor charge a workshop would add. If you ever run into a design that doesn’t match the general steps above, a quick look at your owner’s manual or a vehicle-specific tutorial will fill in the gap.